This article explains how to setup/configure your local server to integrate with WhosOff in order for your Active Directory users to access their WhosOff account without the need for separate login information. Before following the below steps, an account super user will need to contact the support team, who will be able to provide them with your company's intranet key.
You will require access to your local Web Server. If you do not have this access level, this integration will need to be carried out by a System Administrator or equivalent role within your organisation.
SYSTEM REQUIREMENTS
You will be required to have the following on your server:
- Microsoft IIS (7+ recommended)
- ASP.NET v4 Framework
- Microsoft Active Directory
DOWNLOADING YOUR CUSTOM INTEGRATION FILE
- Login to your Web Server
- Create a new directory to contain your new website
- Within your WhosOff account, click Administration on the Left Hand menu
- Click on Company settings, then click on the Active Directory tab
- Download your custom integration connector file to the new directory you created in step 1.
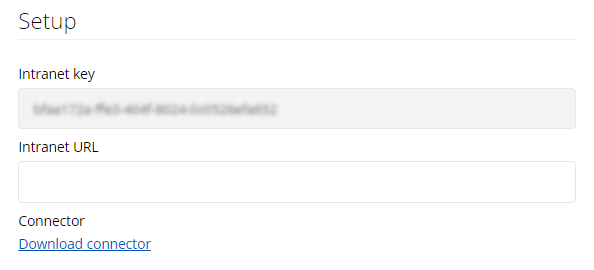
- You may wish to save the file with the name "default.aspx" for convenience later.
CONFIGURING IIS
You may wish to include this integration within an existing local site within IIS, for the purpose of this document we are assuming a new local site will be created.
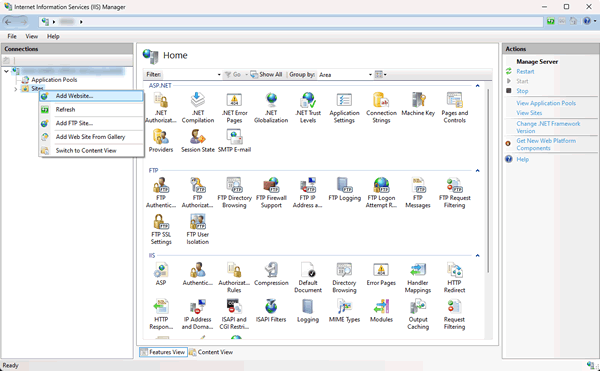
- Login to your Web Server and launch IIS (Internet Information Services)
- From the Sites folder, right click, then select Add Web Site
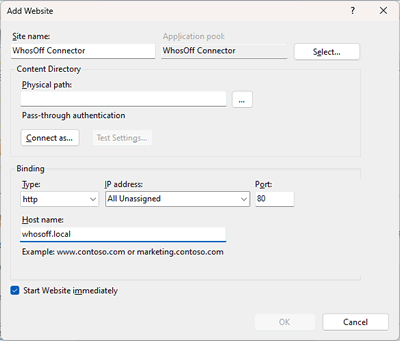
- Supply a name, Application pool (with ASP.NET v4), the physical path for the new site (which you created in the section above), as well as a port, then click on OK.
- Within the site settings, double click on Authentication.
- Make the following settings:
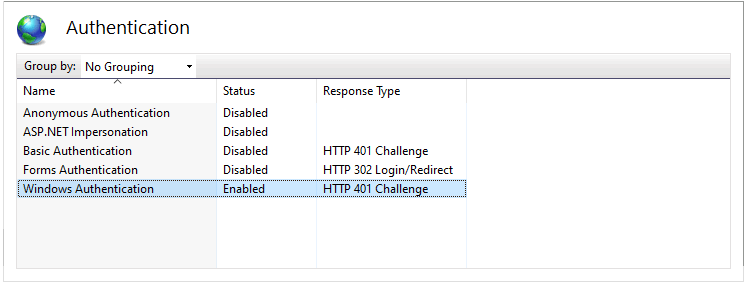
- Anonymous Authentication: Disabled
- ASP.NET Impersonation: Disabled
- Forms Authentication: Disabled
- Windows Authentication: Enabled
- IIS settings are now complete, you may close IIS.
COMPLETING YOUR WHOSOFF INTEGRATION
- In your WhosOff account, return to the Company settings page, under Administration
- Click on the Active Directory tab
- Complete the field labelled Intranet URL with the local address of your new website created in the step above. e.g. "http://localhost:823/autologin_whosoff.com.aspx" (or "http://localhost:823/" if you followed step 5 in the first section of this document and your file is called default.aspx)
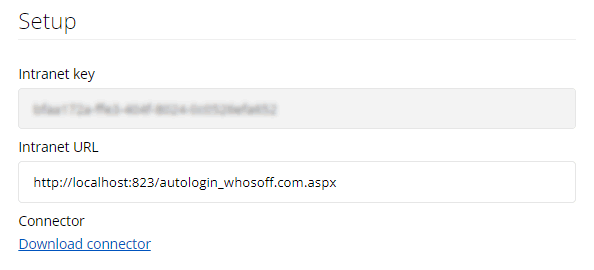
- Click on Save changes.
You will then need to set up an AD username for each staff member who will need to log in via Active Directory. To do this;
- Click Administration on the Left Hand menu
- Click on Manage Staff
- Click on the user's name (you may want to use the filters at the top to find them more easily)
- Click Profile on the left
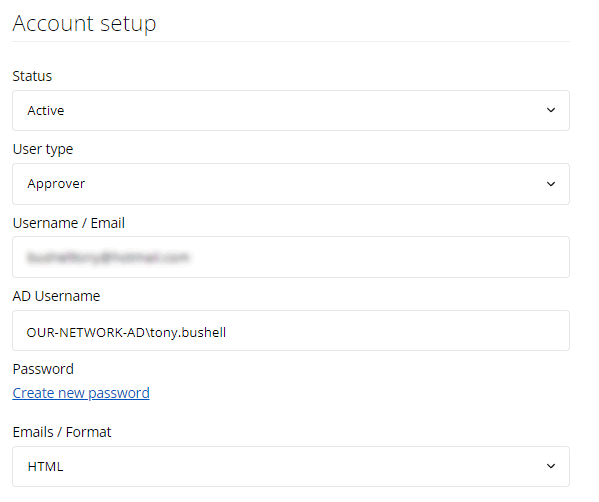
- Under the Account setup section, complete the field labelled AD Username before clicking on Save changes. This is the full Active Directory Domain \ Username used to link your account to WhosOff.
TESTING THE INTEGRATION
- Open a new Web Browser window and navigate to the new website you created on your local Web Server.
- If successful you will be automatically logged into your WhosOff account.
- To complete the process for other users on your Active Directory/WhosOff account, repeat the above section.
If you have any problems, drop our support team an email.
PLATFORMS
Web / OnlineCATEGORIES
3rd Party IntegrationsPHRASES
microsoft ad, active directory, sso, single sign on, login, integrate, integration